总览
主要为研究Linux Kernel中的bpf模块以及RISC-V架构的处理器,首先需要搭建好开发调试环境。由于宿主机使用的是Windows平台的WSL2,需要编译虚拟机和搭建交叉编译环境。为方便调试和最小化搭建,Linux根系统使用BusyBox。
环境
编译
安装编译工具链
安装交叉编译环境
# !!!之后在编译过程中注意缺少的 dev 库和软件!!!
# !!!使用 apt-cache search 查找相应的软件和库, 安装上即可!!!
# !!!请自行解决依赖!!!
sudo apt-get install gcc-riscv64-linux-gnu clang
编译 QEMU
# 下载源码
wget https://download.qemu.org/qemu-7.2.0.tar.xz
tar xvJf qemu-7.2.0.tar.xz
cd qemu-7.2.0
# 使用 ./configure --help 查看配置参数
# 由于编译到宿主机, 不交叉编译
# 安装到 /opt/qemu 目录下, 二进制在 /opt/qemu/bin 中
# 注意 linux-user 只是模拟用户态别选择错了, 使用 softmmu
./configure --prefix=/opt/qemu --target-list=x86_64-softmmu,riscv64-softmmu,aarch64-softmmu
make -j8
sudo make install
编译 Linux Kernel
# 下载源码, 慢可以选择其他镜像站
git clone git://git.kernel.org/pub/scm/linux/kernel/git/torvalds/linux.git --depth=1
# 生成一份 riscv 架构的默认配置编译文件
make ARCH=riscv defconfig
# 进行配置, 自行裁剪
make ARCH=riscv menuconfig
# Kernel hacking
#     -> Compile-time checks and compiler options
#        -> Debug information (Disable debug information)
#            -> Rely on the toolchain's implicit default DWARF version 生成debug信息
#         -> Generate BTF typeinfo 开启BTF功能,方便后期开发bpf
#        -> Provide GDB scripts for kernel debugging 生成调试脚本
# 编译, 这里会选择一些关于 riscv 的配置选项, 不清楚就直接敲回车
make ARCH=riscv CROSS_COMPILE=riscv64-linux-gnu- -j8
验证
# 在 kernel 源码目录新建一个 debug 文件夹作为调试工作目录
mkdir debug
cd debug
/opt/qemu/bin/qemu-system-riscv64 -kernel ../arch/riscv/boot/Image -nographic -append "console=ttyS0 root=/dev/ram init=/init" -machine virt出现panic证明交叉编译的kernel是成功,因为没有根文件系统启动时必然发生panic,按Ctrl+a然后按x退出QEMU。

根文件系统搭建
内核加载时会在根目录(这里采用initrd方法,也可以采用网络等方法)查找init程序执行,进入用户态。接下来我们使用busybox构建这个根目录,你也可以使用systemd、sysvinit等构建。
# 下载 busybox 源码, 下载慢可以选择其他镜像站
git clone git://git.busybox.net/busybox
cd busybox
# 进行配置
make menuconfig
# Settings(Build Options)
#    -> 勾选 Build static binary (no shared libs) 不使用静态库
#     -> Cross compiler prefix 设置为 riscv64-linux-gnu-
# 退出保存配置并编译
make -j4
# 默认安装在 busybox/_install 中
make intallbusybox编译完成,接下来构造根文件系统。
# 回到之前创建的内核 debug 文件夹
mkdir rootfs
# 拷贝编译的 busybox 文件夹到 rootfs 中
cp -r ${WORKSPACE}/busybox/_install/* ./rootfs/
# 创建内核中硬编码需要的设备
mkdir rootfs/dev
sudo mknod rootfs/dev/console c 5 1
sudo mknod rootfs/dev/ram b 1 0
sudo mknod rootfs/dev/tty2 c 4 2
sudo mknod rootfs/dev/tty3 c 4 3
sudo mknod rootfs/dev/tty4 c 4 4
sudo mknod rootfs/dev/null c 1 3
# 创建 init 程序链接到 busybox
ln -s bin/busybox rootfs/init
# 创建 etc/init.d/rcS 脚本
mkdir -p rootfs/etc/init.d
# 在 rootfs/etc/init.d/ 创建 rcS 脚本,并给予可执行权限
    # #rootfs/etc/init.d/rcS
    # #!/bin/sh
    # mount -t proc proc /proc
    # mount sysfs /sys -t sysfs
    # mdev -s
chmod +x rootfs/etc/init.d/rcS
# 创建需要的文件夹, rcS 脚本在启动时挂载内核 proc 和 sys 然后使用 mdev 自动创建 /dev
mkdir rootfs/proc
mkdir rootfs/sys创建好之后使用cpio命令制作initrd。
cd rootfs
find . | cpio -o -H newc | gzip > ../initramfs
调试
使用QEMU启动内核。
/opt/qemu/bin/qemu-system-riscv64 -kernel ../arch/riscv/boot/Image -nographic -append "console=ttyS0 root=/dev/ram init=/init" -machine virt -initrd initramfs
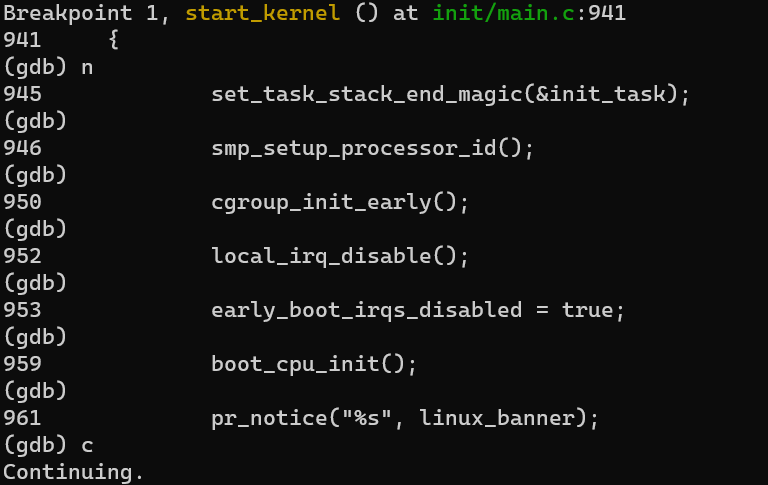
使用QEMU和GDB调试内核。
# 关闭 aslr 功能, 否则 gdb 可能找不到断点地址失效
# -s -S 参数会使 qemu 暂停, 直到gdb链接, 默认远程端口为 1234
/opt/qemu/bin/qemu-system-riscv64 -kernel ../arch/riscv/boot/Image -nographic -append "console=ttyS0 root=/dev/ram init=/init nokaslr" -machine virt -initrd initramfs -s -S
# 在开一个新窗口进入 linux 源码目录, 会自动加载之前编译生成的 gdb 脚本
gdb-multiarch vmlinux
(gdb) target remote :1234
(gdb) b start_kernel
(gdb) c